“Wait, which note is the 3rd of this chord again?” “That note I just played over the chord — what degree is it?”
When you memorize chords as shapes, your hands freeze the moment you try to think about what each ringing note actually is in degree terms. Once the relationship between chord tones and tensions becomes visible, both voicing choices and improvisation get dramatically easier.
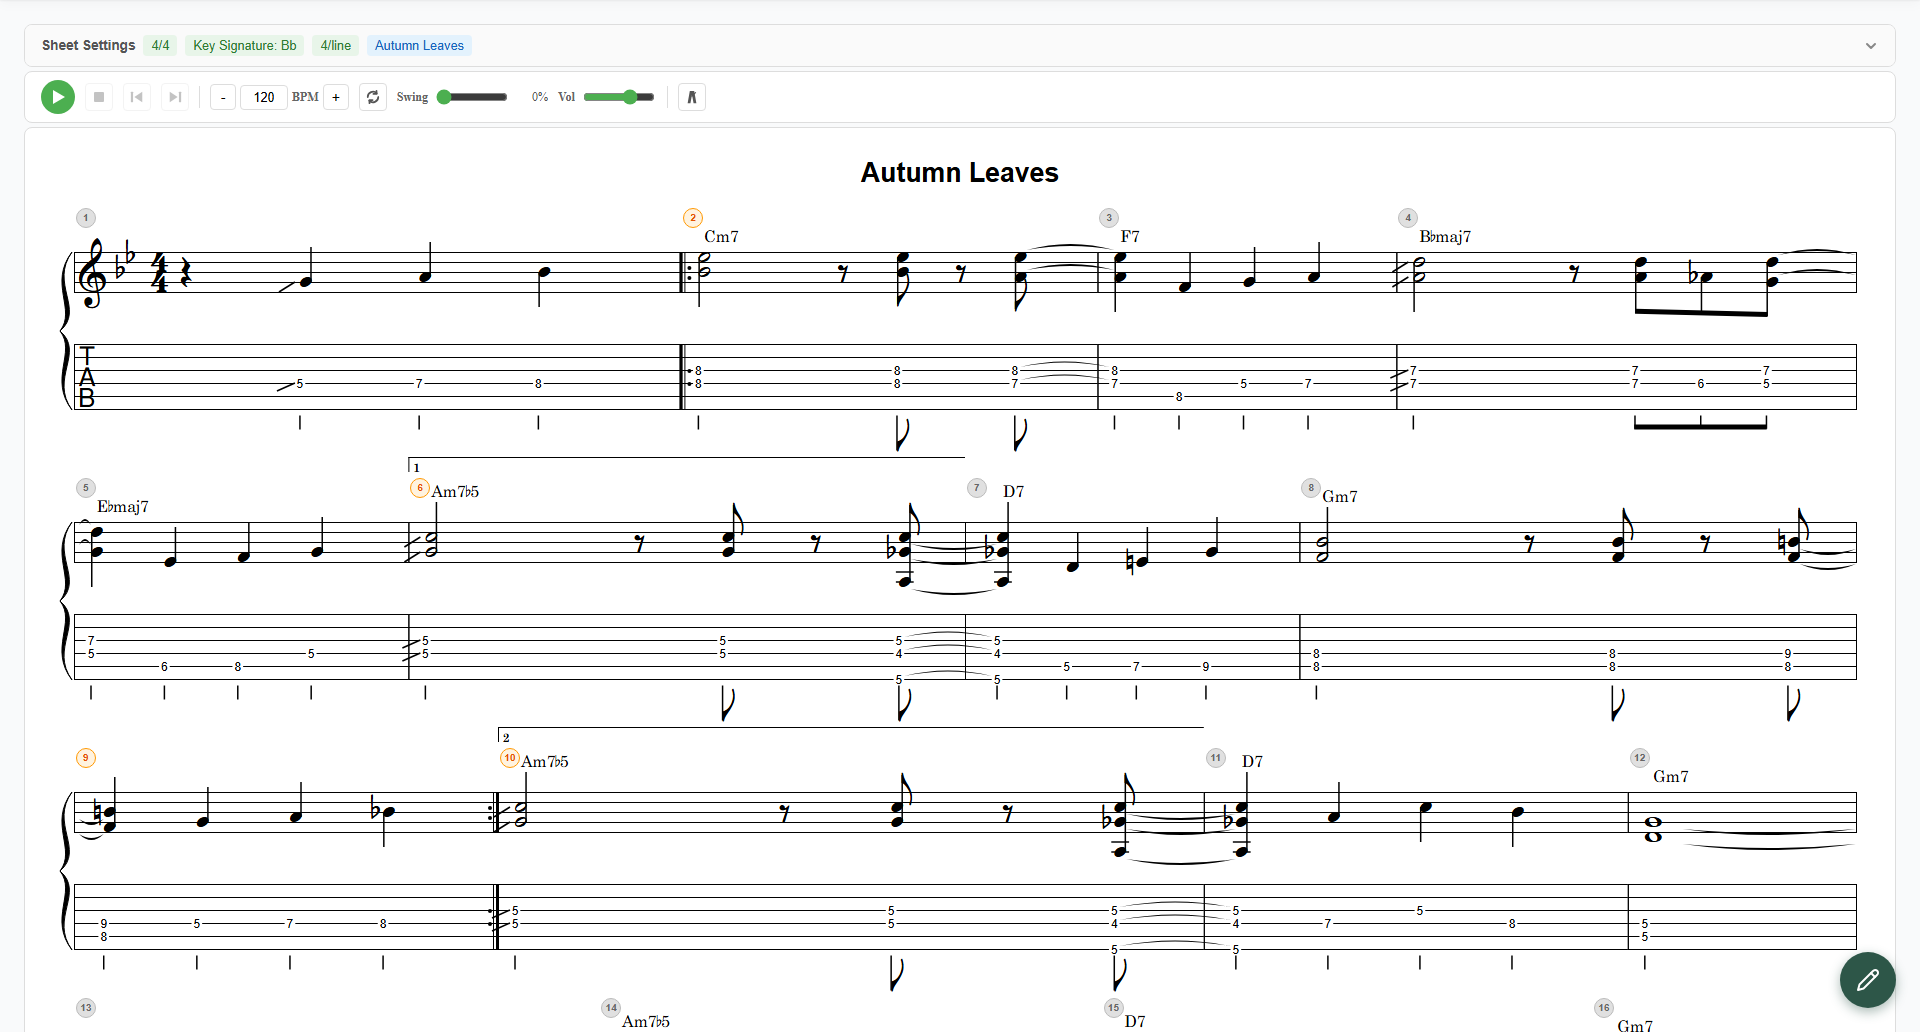
This article shows how to use notave’s Interval Display — which labels every note on the staff with its degree — to start reading chords by degree instead of by shape.
What changes when you see chords as degrees, not shapes?
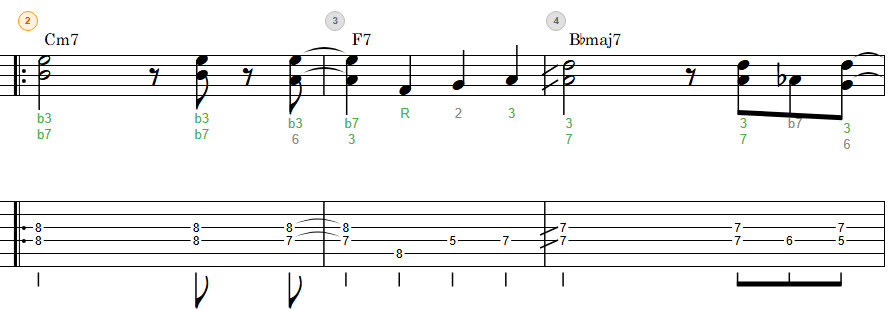
Try it for yourself. On the ii–V–I (key of C) below, flip the toggle (top-right) to Degree. Each note gets a label: R (root), 3, 5, 7, b7, and so on.
Dm7
G7
Cmaj7
Even with the same fingering, degrees reveal the role of each note — “the top voice here is the 3rd,” “the 7th sits underneath here.” notave’s Interval Display does exactly this, automatically, right on your sheet.
What is a degree (interval), anyway?
A degree expresses how far each note sits from the chord’s root. The common ones:
- R: the root (the chord’s reference note)
- 3 / b3: major / minor 3rd (decides major vs minor)
- 5 / b5 / #5: perfect / diminished / augmented 5th
- 7 / b7: major / minor 7th (decides maj7 vs dominant 7th)
- Tensions: 9, #9, 11, #11, b13, 13, b9 — notes stacked above the octave
The key idea: a chord’s character is mostly decided by its 3rd, 7th, and tensions. Compare A major (Amaj7) and A minor (Am7) below — the only difference is the 3rd and the 7th.
Amaj7 (R 3 5 7)
Am7 (R b3 5 b7)
What notave’s Interval Display does
Turn on Interval Display and the degree of every note appears in a lane between the staff and the TAB. As you build a sheet, you can see at a glance which note you’re playing against the chord.
Two things make it useful:
- It distinguishes chord tones from tensions. You can tell whether a note belongs to the chord (a chord tone) or sits outside it (a tension or passing tone). R, 3, 5, 7 are chord tones; 9 or #11 are tensions — and the relationship is obvious.
- Spelling follows the chord quality. The same pitch can be spelled differently depending on whether the chord is major, minor, diminished, augmented, or dominant. (A minor 3rd reads as
b3; the same pitch stacked above a major chord reads as#9.) You don’t have to memorize the rules — notave picks the spelling that fits the context.
How to turn it on
It only takes a moment:
- Set a chord on the sheet (enter a chord name in Chord mode, or declare a chord on a note).
- Turn on “Show intervals” in the sheet settings.
- The degrees appear between the staff and the TAB.

Interval Display is free to use (no login required).
Degrees are computed relative to the chord you set, so notes without a chord show no degree. A chord applies from the note where it’s declared through the same measure (until the next chord, or the measure’s end) — so start by placing chords on your progression.
Reading degrees — chord tones vs tensions
The tricky part of degree notation is cases like b3 vs #9, b5 vs #11, #5 vs b13 — the same pitch with a different name. The distinction depends on whether the note sits inside the octave (a chord tone) or is stacked above it as a tension.
- A minor 3rd inside the octave →
b3(a chord tone of a minor chord) - The same pitch stacked above the root of a major chord →
#9(a tension) - An augmented 4th that’s a chord tone reads as
b5; stacked as a tension it reads as#11
notave handles this automatically from the chord quality and octave. That’s why you can learn by seeing it on the sheet rather than “after memorizing all the theory.” Compare the ringing note and its degree label enough times, and you’ll naturally start to feel “ah, that’s the #11.”
Putting it to use in practice
Seeing degrees makes these practice routines flow:
- Improvisation: practice “aiming for the 3rd and 7th” or “placing tensions intentionally,” and check your work on the sheet.
- Voicing choices: when you try Drop 2 voicings or rootless / chord-tone omission, confirm exactly which notes you kept and which you dropped — in degrees.
- Connecting ear and theory: with playback, listen to the sound while watching the degrees, and “this tension is the b9” starts to click.
Summary
With notave’s Interval Display, you can understand chords by degree instead of by shape.
- See the degree of every note between the staff and the TAB
- Chord tones and tensions are distinguished, with spelling that follows the chord quality
- Free, no install — try it in your browser
If you want to change how you see chord tones, or understand improvisation and voicings in degrees, head to notave.zelva.dev and display intervals on your own progression.
And when you want to hand a finished sheet to someone, see the share-link feature that sends it in a single URL.