Chord Select mode is wonderfully convenient, but sometimes the exact shape you want to play just isn’t among the suggested candidates. That’s when you reach for Manual Input mode.
Instead of letting notave suggest, Manual Input lets you specify strings and frets yourself and stack up notes one at a time. Unusual voicings and fingerings you won’t compromise on come together exactly as you intend. This article walks through the input panel one part at a time.
Manual Input lives in the “Chord Assist” group of the mode tabs. It’s hidden when you’ve selected bass (a single-note instrument). For the big picture, see the four input modes.
1. Choose notes on the fretboard
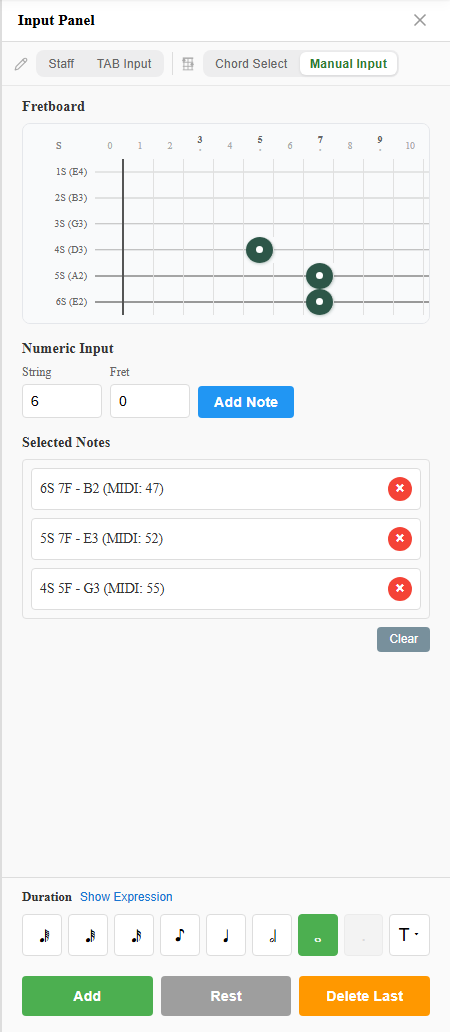
The most intuitive option is the fretboard.
- Tap a position to add that note; tap it again to remove it.
- Each open string shows the note name of your current tuning. Change the tuning or capo and that’s reflected here too.
- Tap several positions and you’ve built a chord (multiple notes).
You assemble the notes you want right on the fretboard, just like fretting the guitar.
2. Specify exactly with numeric input
When the position is already clear in your head — say “string 3, fret 2” — numeric input is faster.
- String: the string number (1 to the instrument’s string count)
- Fret: the fret number (0 to 19)
- Add Note: adds the note at that string and fret to the list
It brings up the numeric keypad on phones too, so you can punch values in quickly.
3. Review and adjust in “Selected Notes”
The notes you add are collected in the Selected Notes list.
- Each row shows the string, fret, note name, and MIDI note number, like
String 6, Fret 3 - C (MIDI: 48). - The × on a row removes just that note.
- Clear wipes all selected notes so you can start over.
Because you can see exactly which notes you’re stacking, you can confirm the voicing sounds the way you intended before you place it.
4. Add it to the sheet
Once the notes are set, write them to the cursor position with the action buttons at the bottom.
- Add: adds the selected notes to the sheet at the chosen duration (disabled when no notes are selected).
- Rest: makes that position a rest.
- Delete Last: undoes the most recent addition.
Tap a note group you’ve already placed to enter edit mode, where ”Done”, ”To Rest” (or ”To Note”), ”Delete”, and ”Cancel” let you swap the contents after the fact.
Manual Input vs Chord Select
Both place chords, but they play different roles.
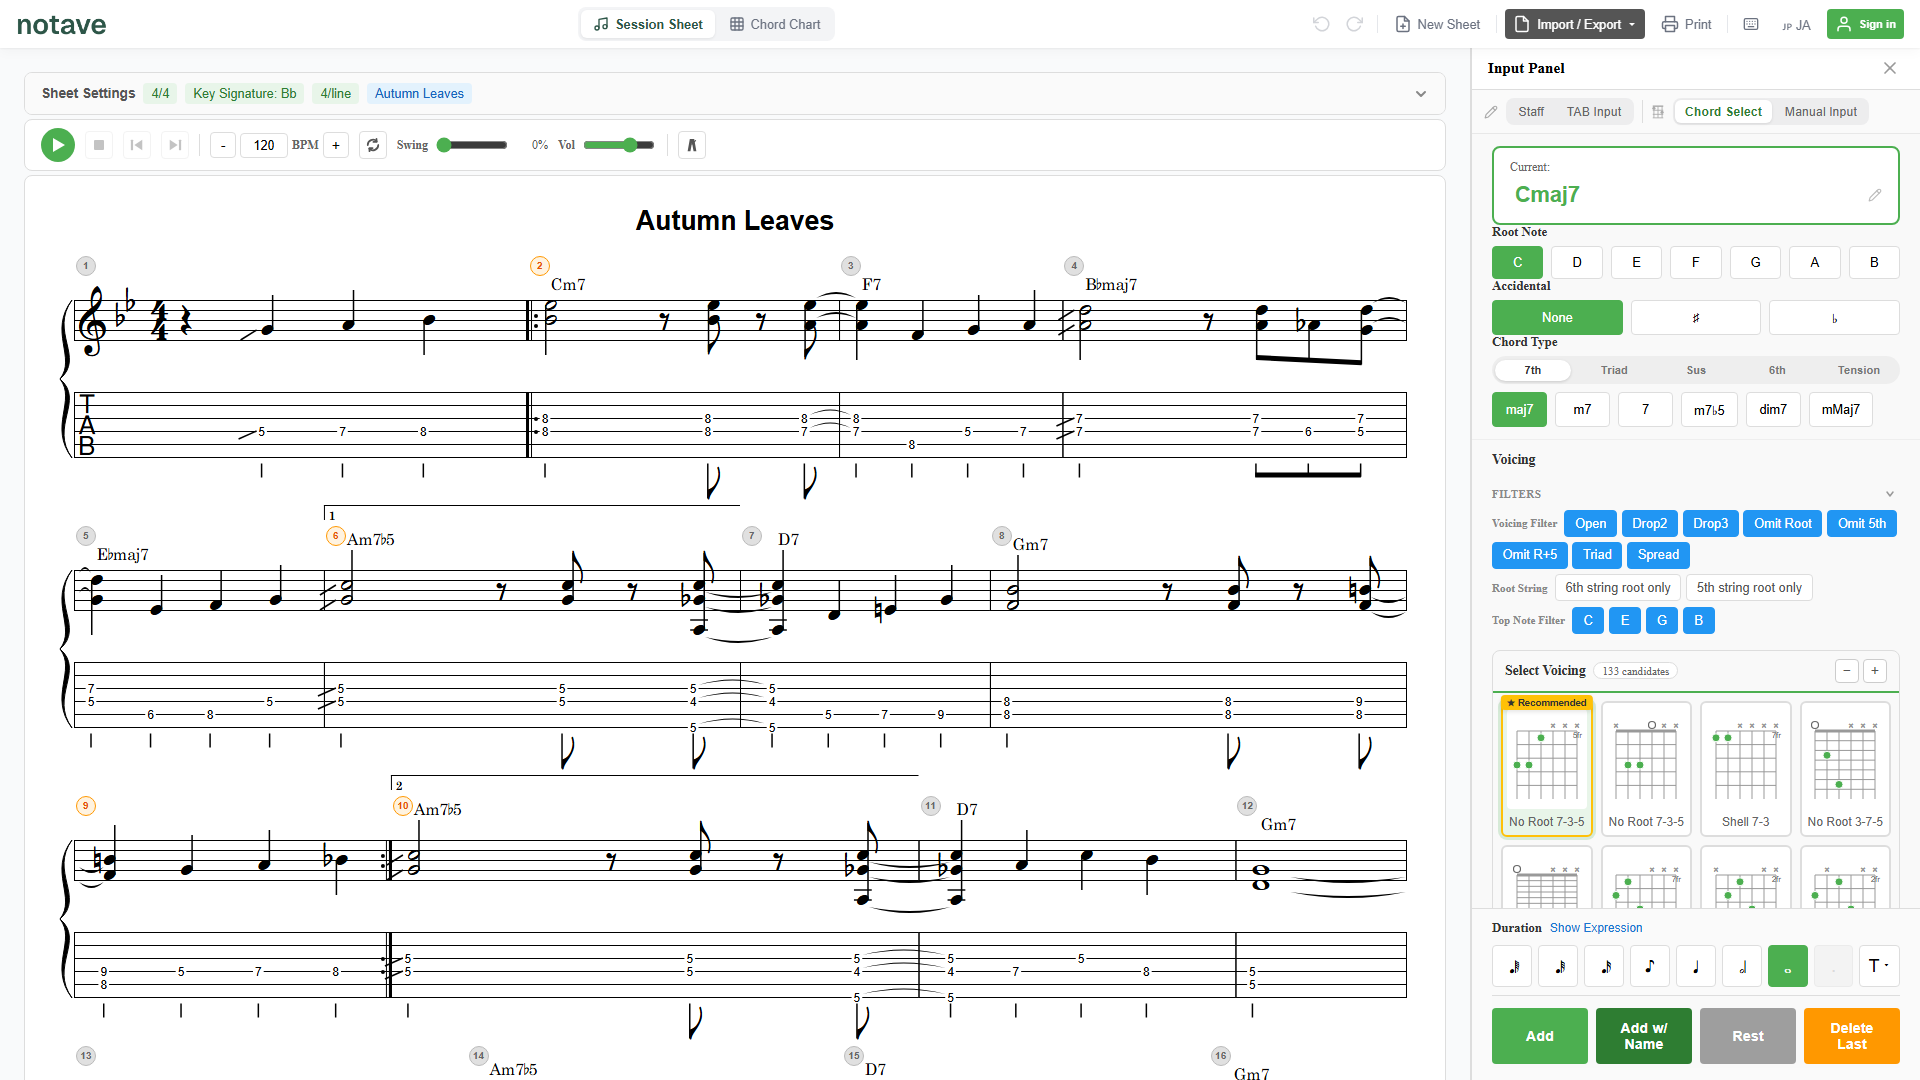
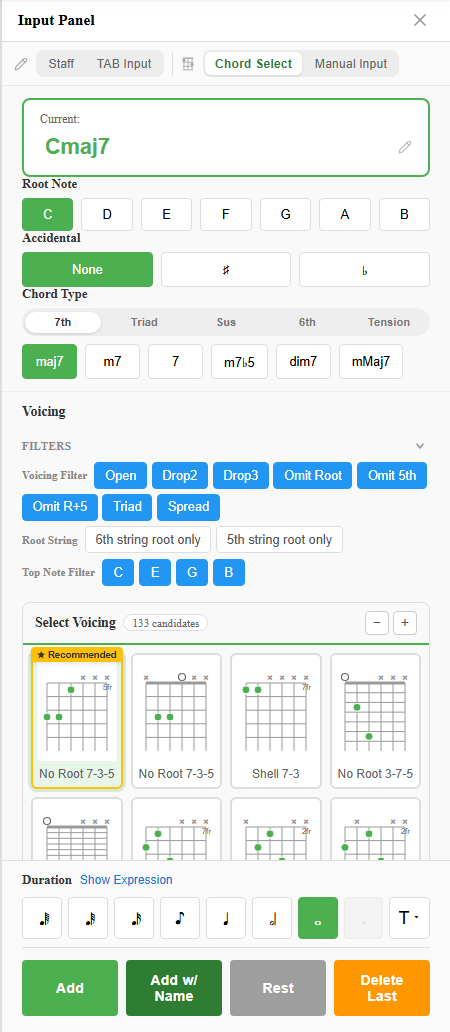
- Chord Select mode: name a chord and notave suggests theory-based fingerings. Best when you want to pick from candidates.
- Manual Input mode: no suggestions — you specify strings and frets directly. Best for shapes that aren’t among the candidates, or a specific fingering you want to pin down.
A practical split is “Chord Select by default, Manual only for the shapes it won’t give you.” Notes you build manually are still rendered properly on both the staff and the TAB.
Summary
Manual Input mode flows like this:
- Specify notes by tapping the fretboard or typing string/fret
- Check the voicing in “Selected Notes” (drop unwanted notes with ×)
- Add it to the sheet
The strength of this mode is putting the shape in your head straight onto the page, without being bound by notave’s suggestions. Build a favourite voicing of yours at notave.zelva.dev.
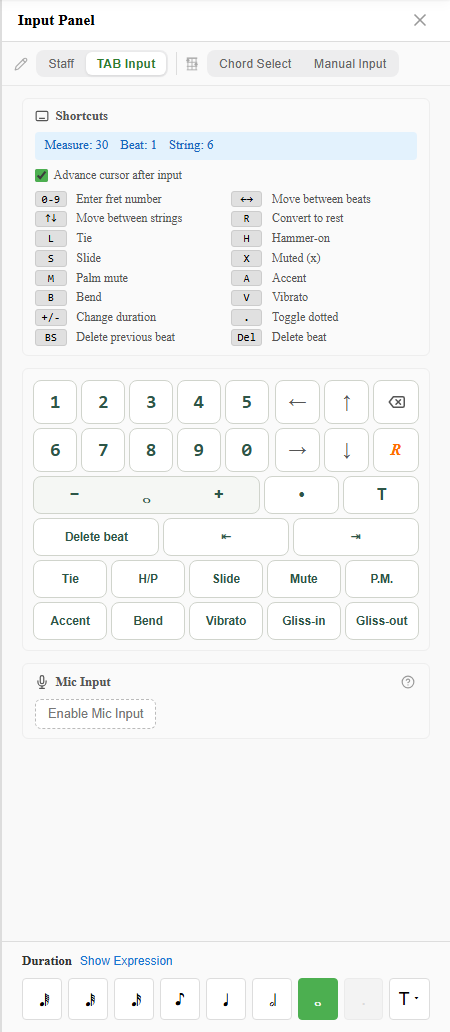
To get candidates quickly from a chord name, see Chord Select mode; to enter single-note phrases, see TAB Input mode.