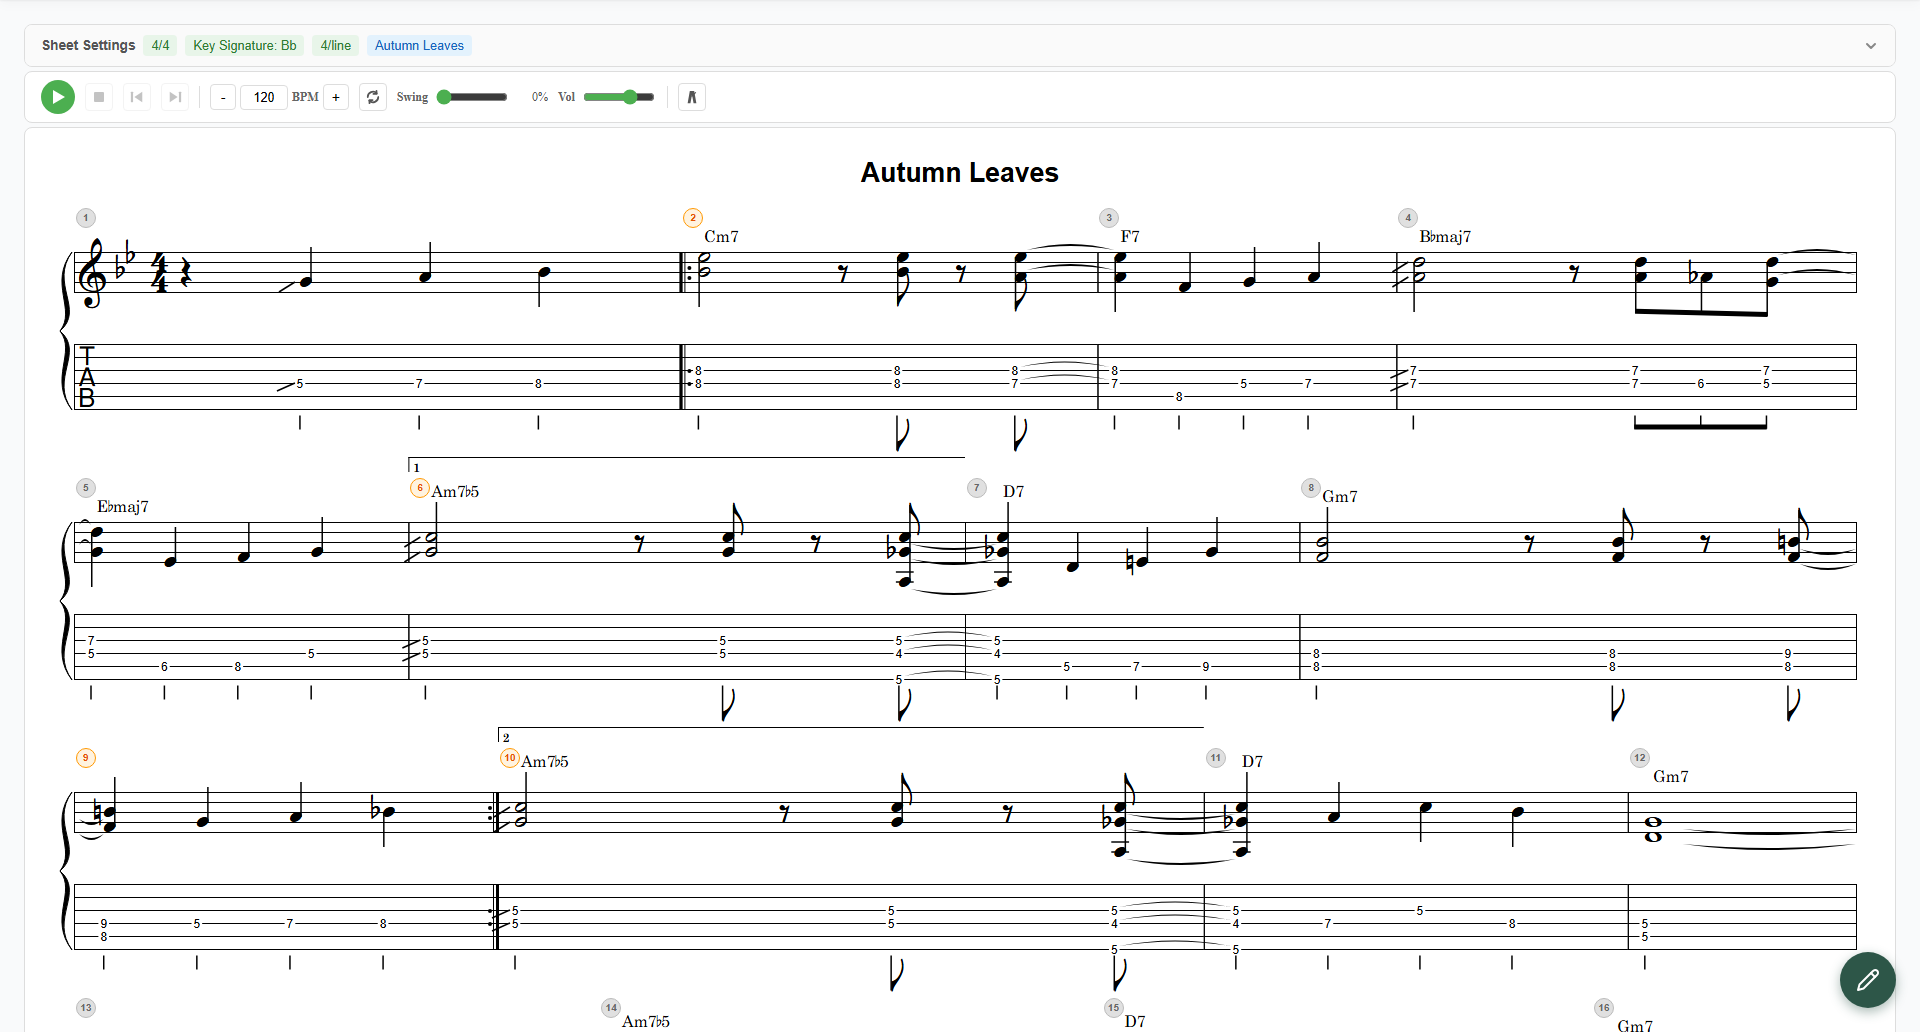
When you build a sheet in notave, the part you actually type your music into is the input panel at the bottom of the screen (on mobile, you pull it up from the bottom edge).
That panel offers four input modes, and you switch between them with the tabs at the top. At first you might wonder “which one should I use?”, but each has a clearly defined job — pick the one that matches your goal and entry gets much faster.
This article lays out the differences and when to use each. The detailed steps for each mode live in their own articles, so use this as a jumping-off point.
The panel is split into two groups
The mode tabs are visibly divided into two groups:
- Direct Input (pencil icon): Staff and TAB Input
- Chord Assist (chord-diagram icon): Chord Select and Manual Input
In short —
- Direct Input is for specifying the actual sounds you want (note names or frets), one at a time. It’s best for melodies and riffs.
- Chord Assist starts from placing a chord. It’s best for harmony and backing parts.
If you’ve selected bass (a single-note instrument), the Chord Assist group (Chord Select / Manual Input) is hidden. Bass entry is single-note by nature, so you’ll only see Staff and TAB Input.
The four modes at a glance
| Mode | Starts from | Reach for it when… |
|---|---|---|
| Chord Select | A chord name (e.g. Cmaj7) | You want to place a progression and have notave suggest the voicing |
| Manual Input | A string and fret | You want to specify an exact shape the suggester won’t give you |
| TAB Input | A fret number | You want to type riffs and solos fast with the keyboard |
| Staff | A note name (C, D, E…) | You think in pitch/melody and want notave to handle the fingering |
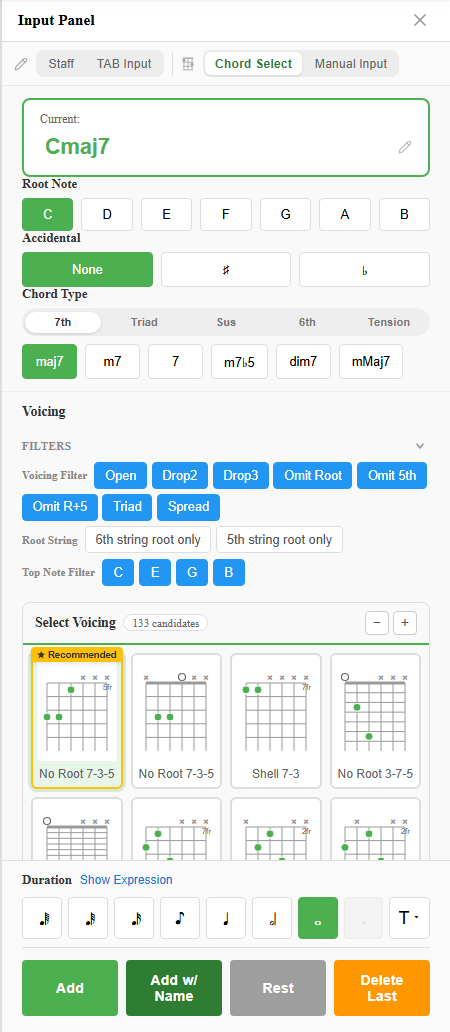
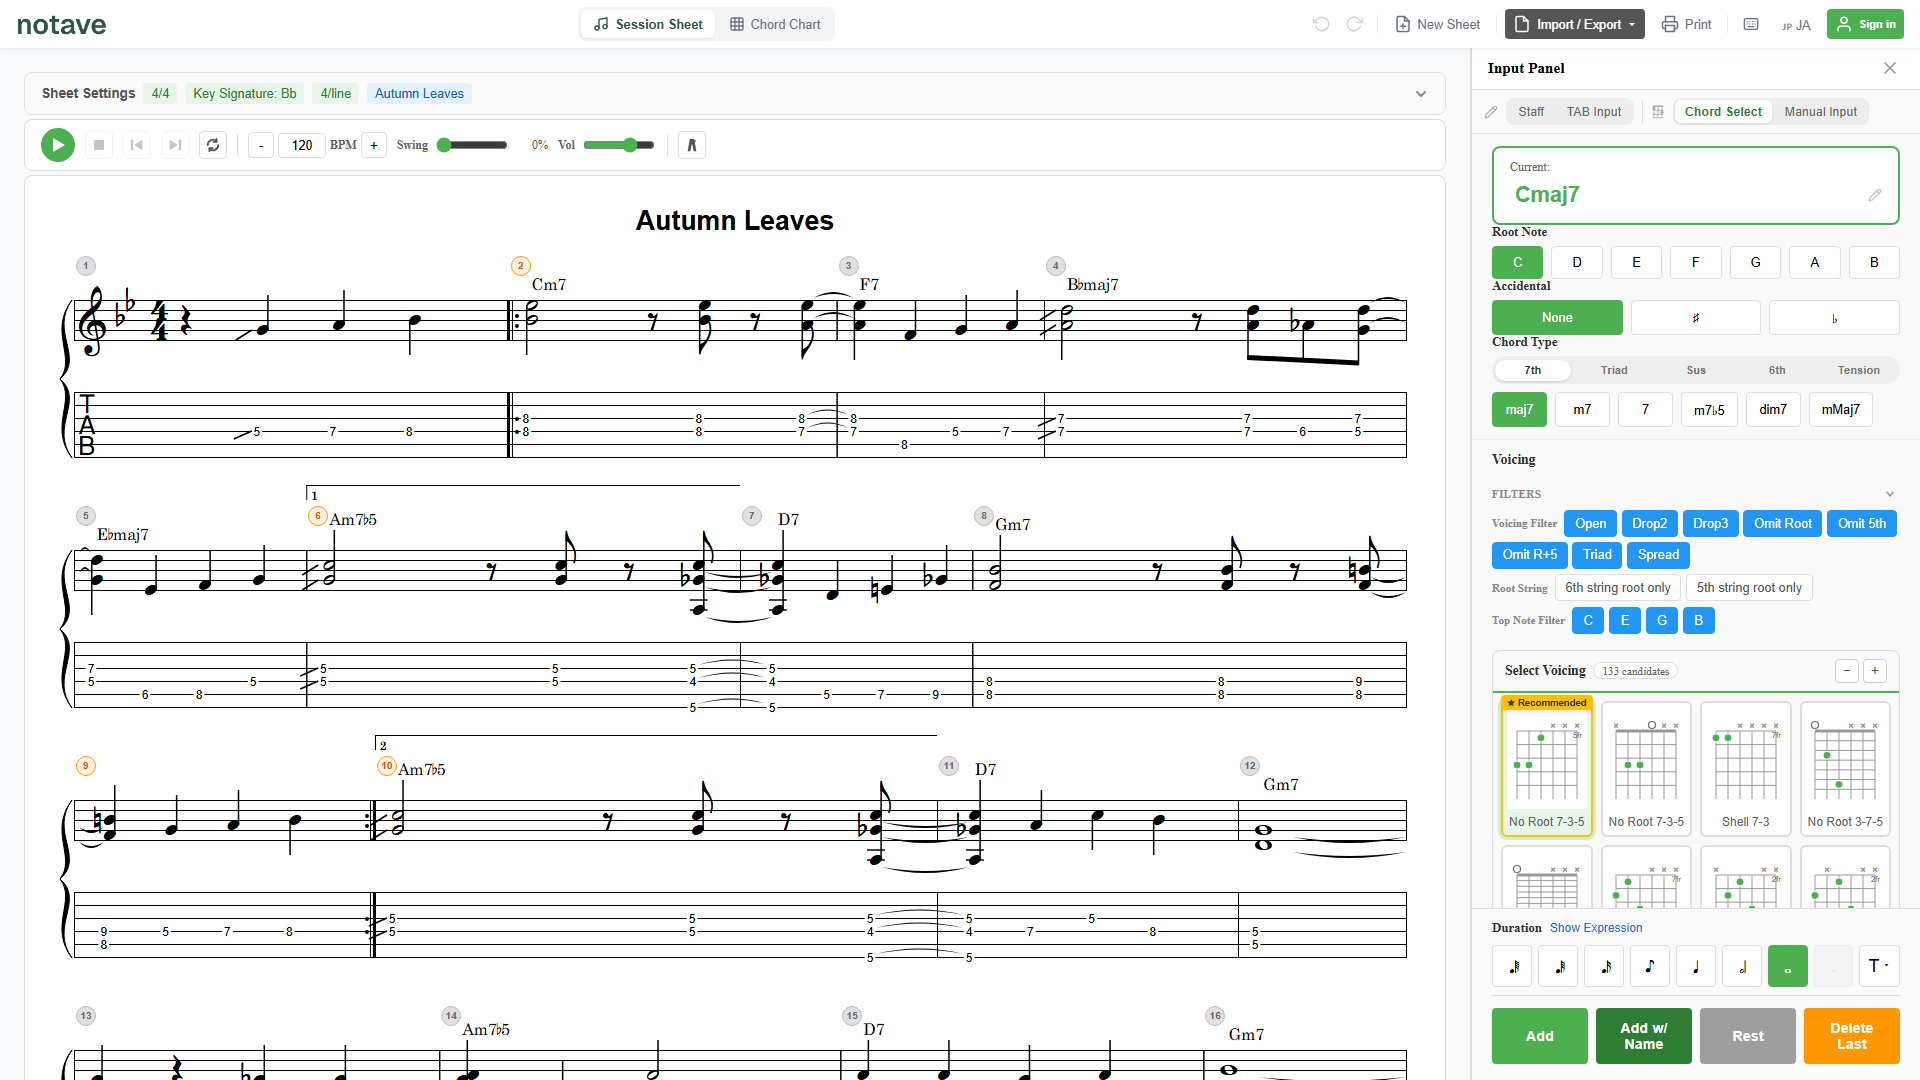
Chord Select mode
Pick a root note and a chord type, and notave automatically suggests voicings (fingerings) based on music theory. Practical shapes like Drop 2, Drop 3, and omit-root are laid out for you, and the candidate that connects most smoothly to the surrounding chords gets a “Recommended” mark.
This is the lead mode for anyone who starts from “how do I voice this chord?“.
Manual Input mode
Tap the fretboard, or type a string number and fret number directly, to stack up exactly the notes you want, one by one. Use it for unusual shapes the suggester doesn’t offer, or when you absolutely need a specific fingering.
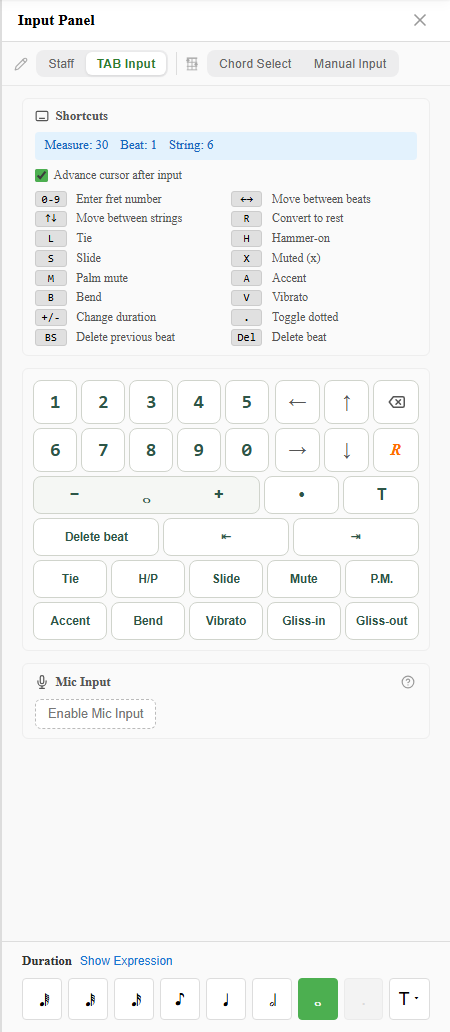
TAB Input mode
Move a cursor around the TAB staff and type fret numbers directly with the number keys. Arrow keys move between strings and beats, and techniques like H (hammer-on) and B (bend) are a single keystroke away. If you’re used to software like Guitar Pro, it’ll feel almost identical.
Staff mode
Place notes on the staff by note name (C, D, E…). Forget about strings and frets for a moment — specify just the pitch you want, and notave converts it into a TAB fingering automatically. You can also cycle through the available fingering candidates to pick the position you like.
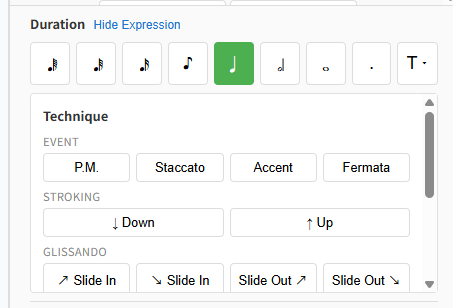
The shared duration & expression selectors
No matter which of the four modes you’re in, a set of shared selectors sits at the bottom of the input panel. This is where you decide not which note to place, but how the note you place should sound.
- Duration: 64th note through whole note, dotted notes, and tuplets (3, 5, 6, 7). Sets the length.
- Articulation: tie, slur, hammer-on, pull-off, slide — how a note connects to its neighbours.
- Technique: palm mute, staccato, accent, harmonics, vibrato, bend (1/2, full, 1 1/2), and more.
In TAB Input and Staff modes you can drive most of these from the keyboard too (number keys for duration, ”.” for a dot, and so on). See each mode’s article for details.
So which one should I start with?
When in doubt, choose by goal:
- Build from a chord progression → Chord Select
- Capture a phrase or solo you just thought of → TAB Input
- Write a melody by note name → Staff
- Pin down an exact fingering → Manual Input
You can switch modes at any time. Mixing them is completely normal — for example, build the backing in Chord Select, then add just the interlude solo in TAB Input.
Open notave.zelva.dev and try pressing all four tabs to feel the difference. No sign-up, no install — the free plan (up to 8 measures) lets you start right away.
For the step-by-step on each mode, head to Chord Select, TAB Input, Staff, and Manual Input. If you’d rather start with a tour of notave as a whole, see creating guitar TAB.