“I’ll figure out the frets later — I just want to get the notes down.” That’s exactly where Staff Input mode shines.
Where TAB Input mode starts from fret numbers, Staff mode starts from note names (C, D, E…). Specify the pitch you want, and notave works out which string and fret to play it on (the fingering) for you. This article walks through the panel parts and key controls in order.
Staff mode lives in the “Direct Input” group of the mode tabs. For the big picture, see the four input modes.
1. Read the cursor position
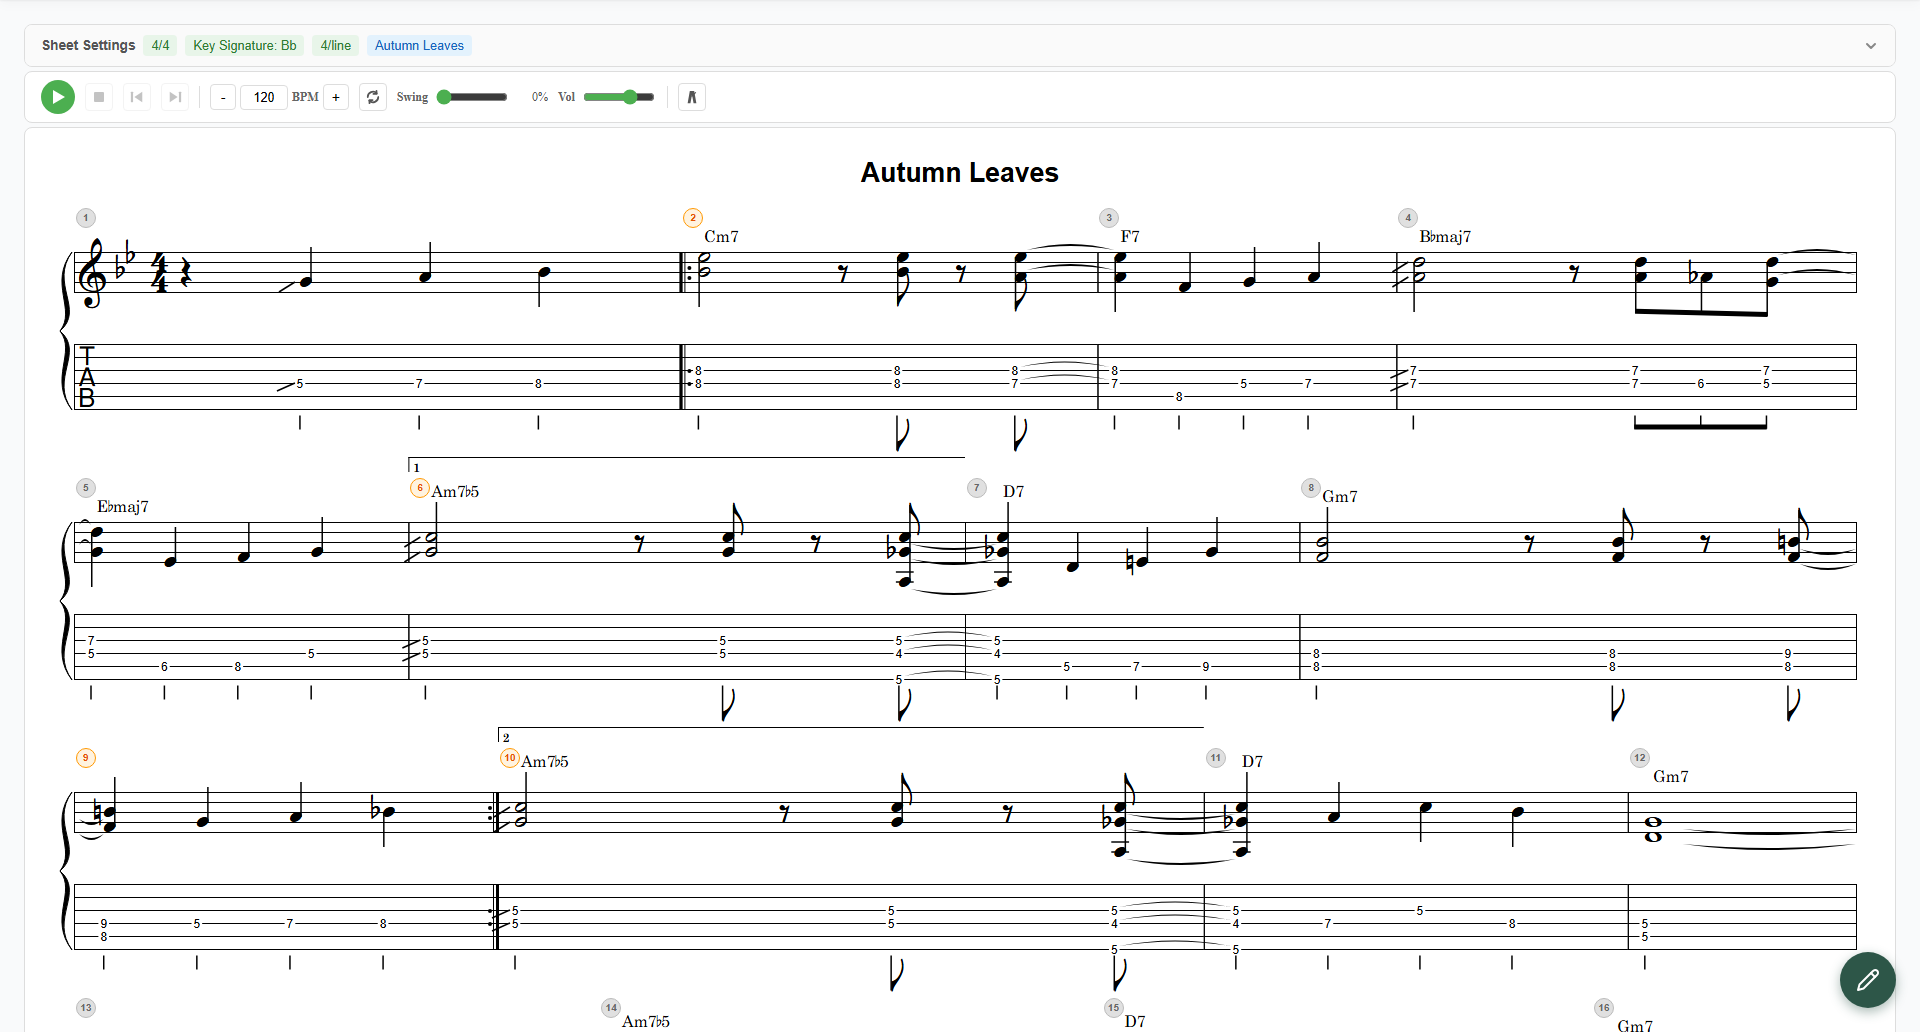
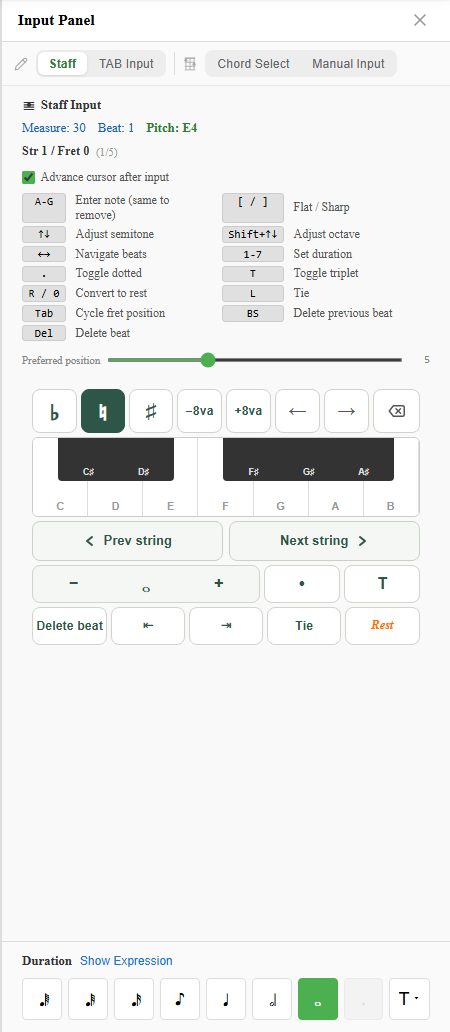
When you enter Staff mode, the top of the panel shows where you’re typing and which note.
- Measure / Beat: the cursor position.
- Pitch: the note name the cursor is on (e.g.
Pitch: G4). - Accidental badge: when you press
[or]for an accidental, a♯/♭badge blinks until the note is confirmed.
2. The “fingering candidate” is the bridge to TAB
The readout unique to Staff mode is the fingering candidate shown beneath the pitch.
- It shows both which string and fret play that note and which candidate it is, like
Str 5 / Fret 3 (2/4). - The same pitch can be played in more than one place. Press
Tab(or the on-screen cycle button) to step through the candidates and pick the position you like. - For chords (multiple notes), this candidate readout doesn’t appear.
So Staff mode flows as: place a note by name → notave suggests a TAB fingering → pick the one you like. It’s the mirror image of TAB Input, which starts from the fret.
3. Preferred position
The ”Preferred position” slider (0–15) lets you tell notave which fret area to favour when suggesting fingerings.
Set it around 7, for example, and fingerings playable near the 7th fret are preferred. It’s a one-shot way to steer a whole passage toward high positions, or keep things down low.
4. Keyboard shortcuts
Here are the key controls for Staff mode (note names are C, D, E…).
| Key | Action |
|---|---|
A–G | Enter note (press the same name again to remove it) |
[ / ] | ♭ / ♯ (accidental) |
↑ ↓ | Adjust by a semitone |
Shift+↑ ↓ | Adjust by an octave |
← → | Navigate beats |
1–7 | Set duration |
. | Toggle dotted |
T | Toggle tuplet |
R / 0 | Convert to rest |
L | Tie |
Tab | Cycle fret position |
BS (Backspace) | Delete previous beat |
Del | Delete beat |
The key points: you enter notes directly with A–G, and pressing the same name again removes it. Accidentals go on with [ (♭) and ] (♯), ↑ ↓ move by a semitone, and adding Shift moves by an octave.
The only real difference from TAB Input is that duration keys are
1–7here (versus+/-in TAB mode).
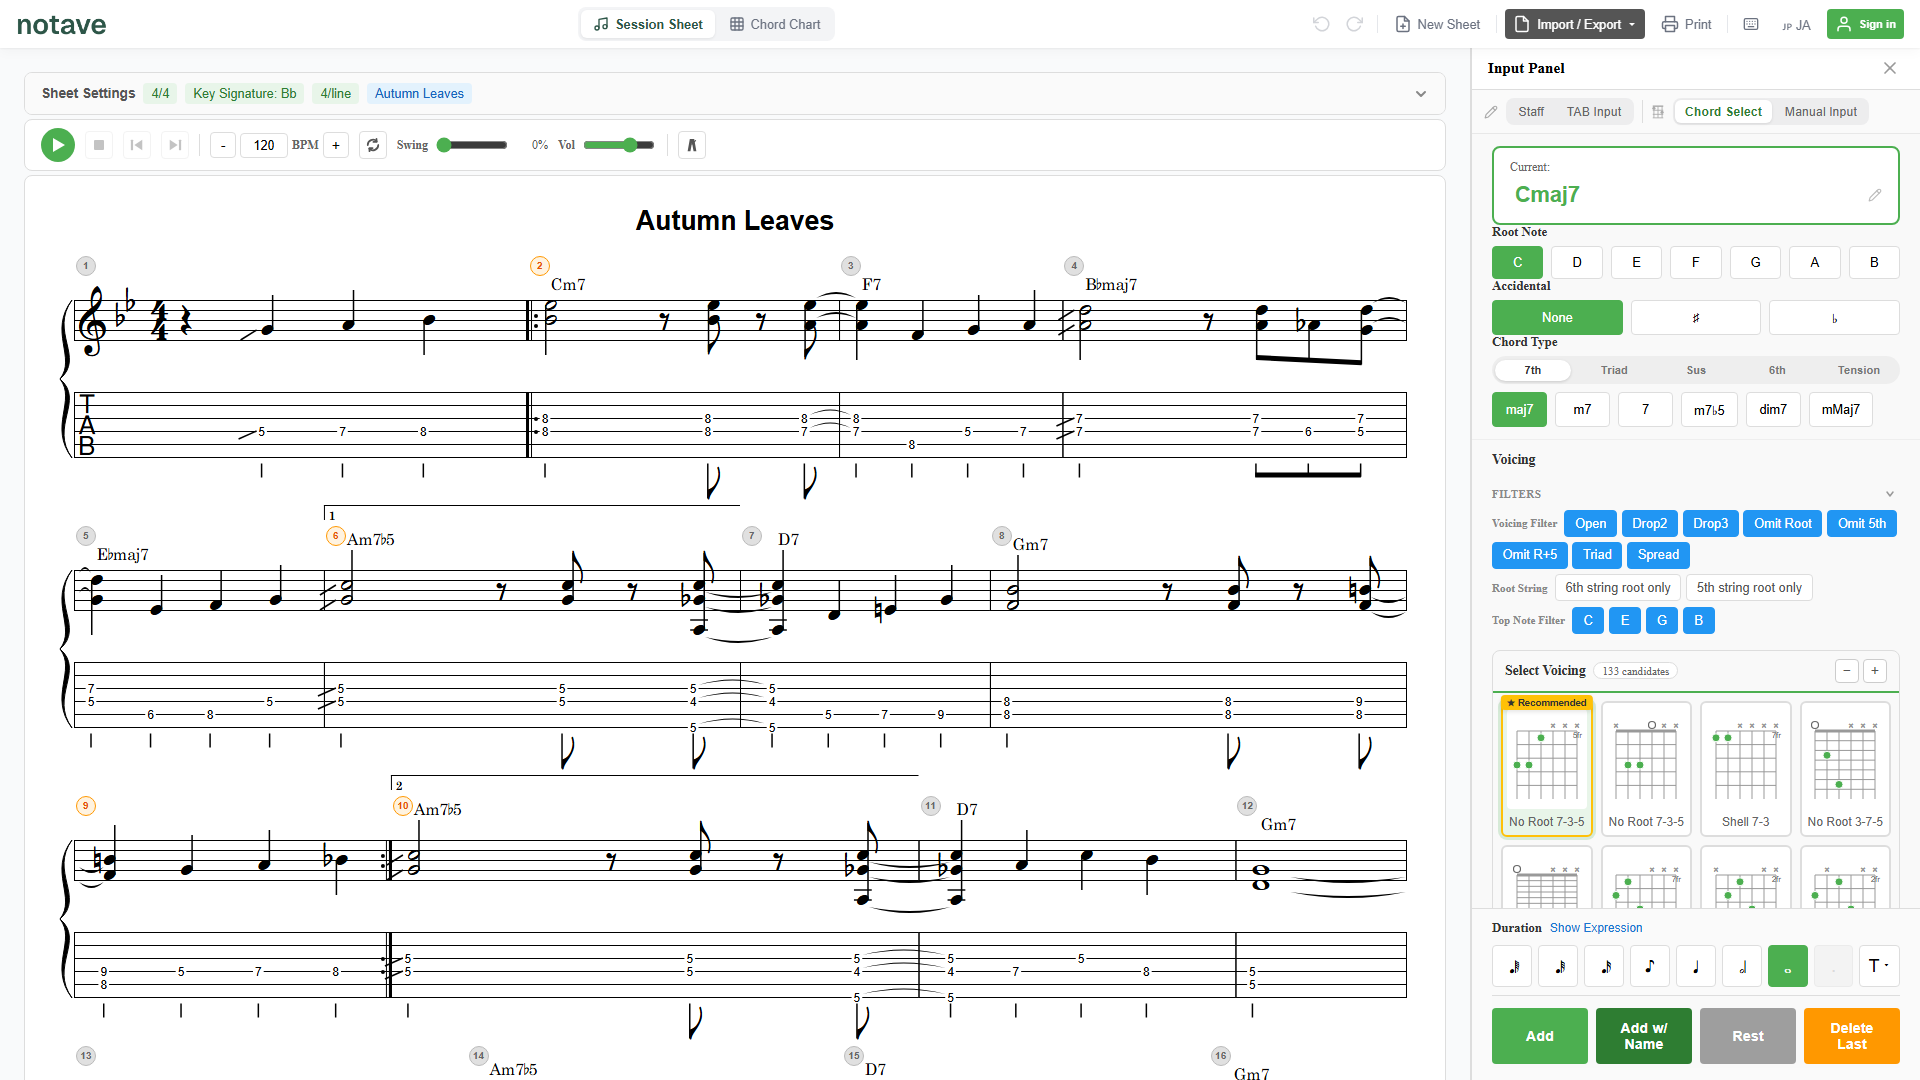
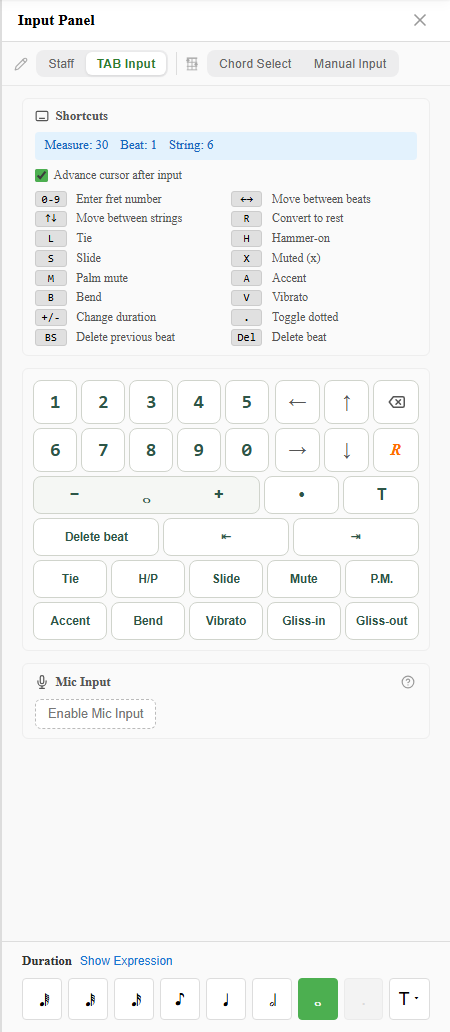
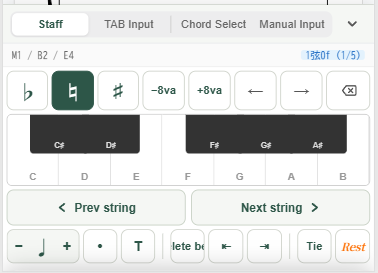
5. You can also enter notes by button (phone / tablet)
On a device without a physical keyboard, use the on-screen input pad. Piano-style note buttons, accidentals, beat movement, a fingering-cycle button, and a duration strip are all gathered there, so you can do everything the keyboard does by tapping.
On touch devices the shortcut legend sits behind a ”Shortcuts” toggle (on a PC it’s always shown).
Summary
Staff Input mode flows like this:
- Place a note with
A–G(plus[]and↑↓) - Cycle fingerings with
Taband pick the position you like (steer the whole passage with Preferred position if you want) - Move to the next beat with
←→
The beauty of this mode is being able to forget strings and frets and focus purely on the pitch you want. Try placing a melody you know, by name, at notave.zelva.dev.
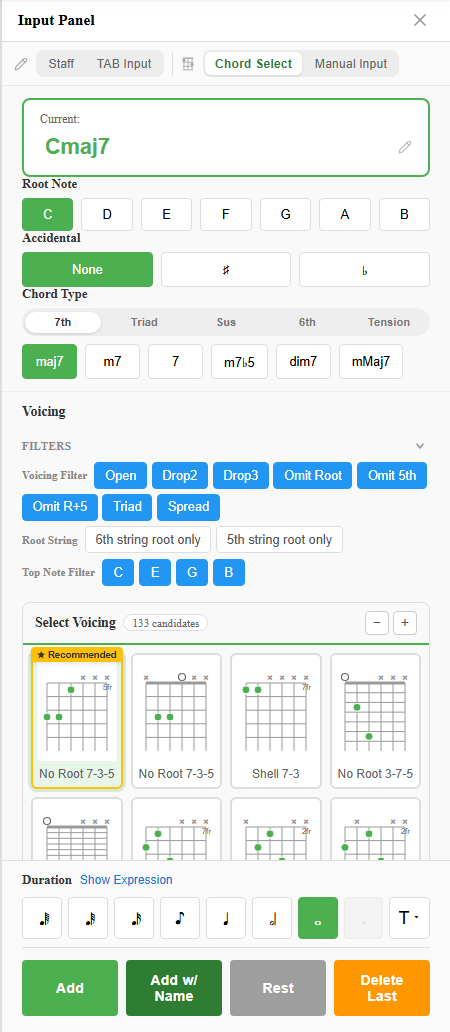
To type from fret numbers instead, see TAB Input mode; to place chords, see Chord Select mode.