“Can I turn this MIDI into guitar TAB?” “I want to see the phrase I programmed in my DAW as TAB, with fingering.” “Writing TAB from scratch is tedious — can’t it be automatic?”
You have the MIDI file, but turning it into guitar or bass TAB means deciding, note by note, which string and fret to play. That adds up fast.
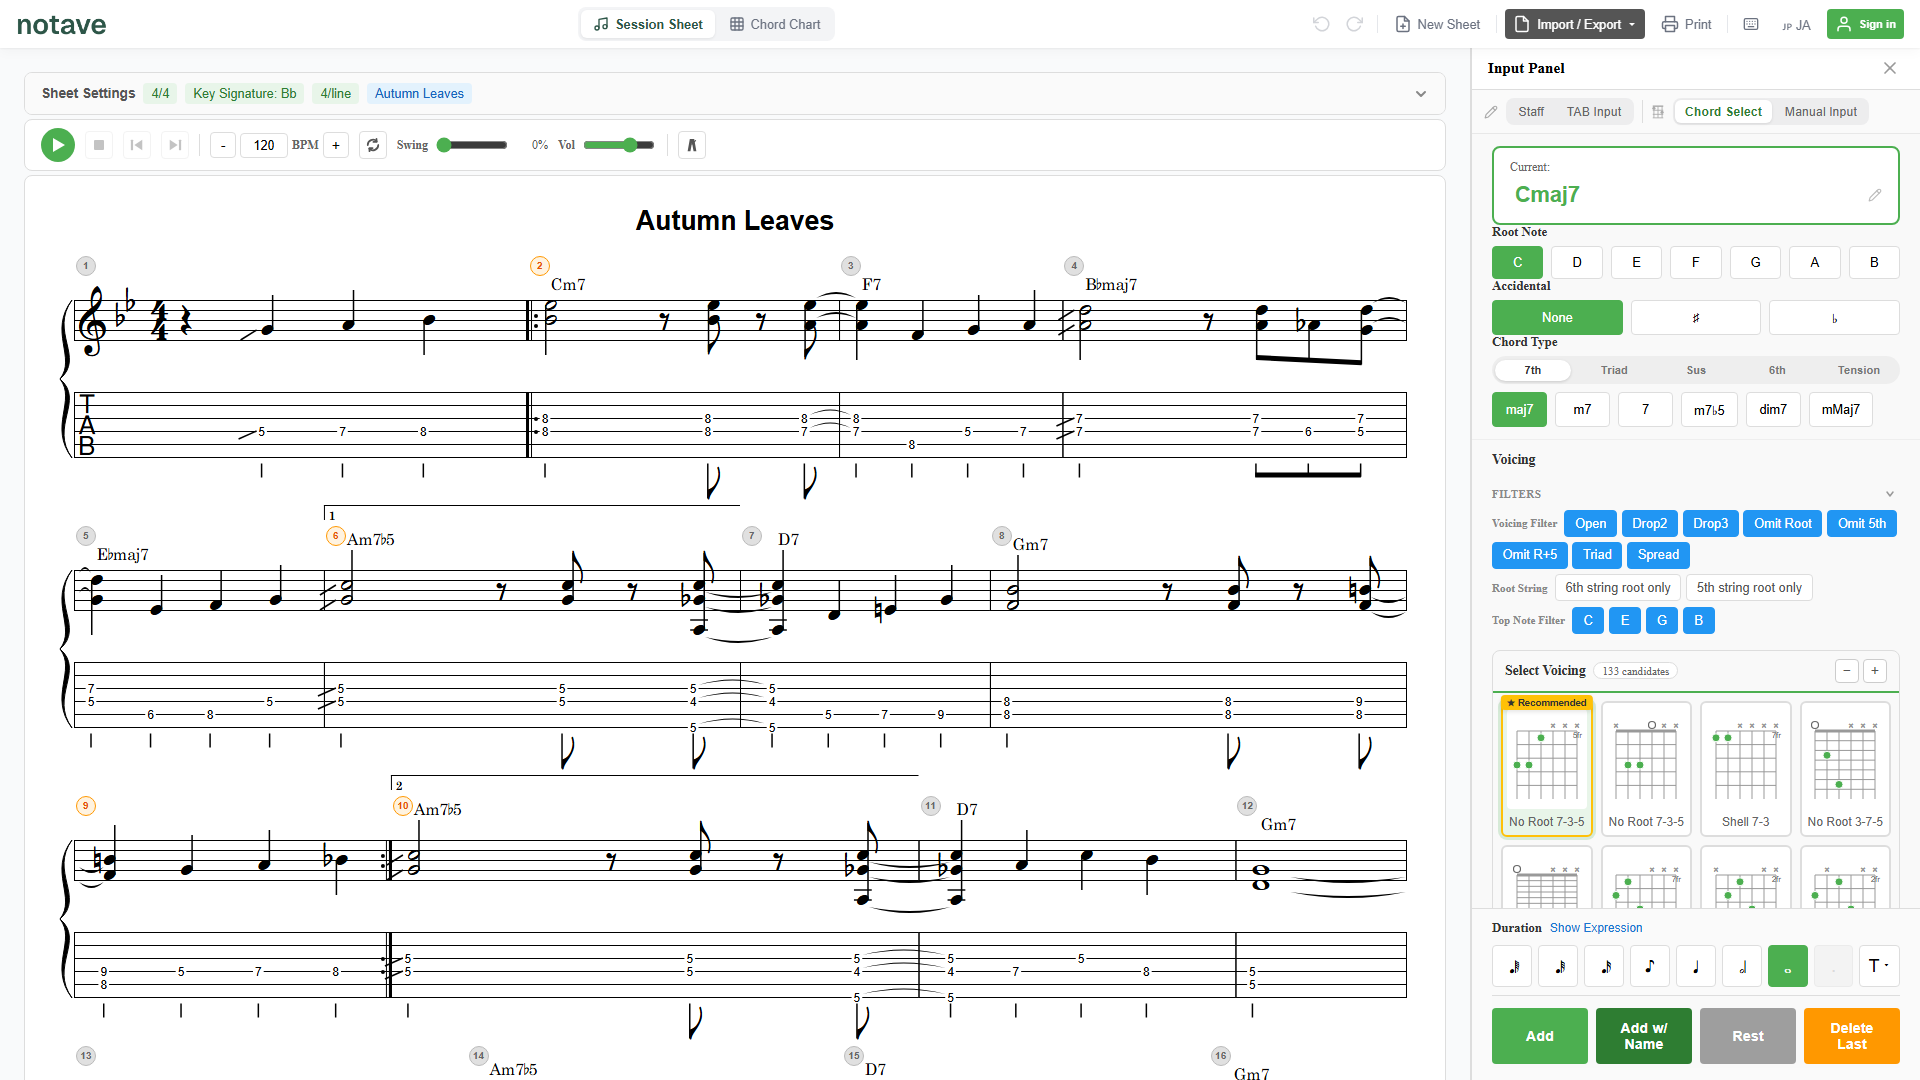
notave’s MIDI import automates the whole thing. Load a MIDI file and notave generates guitar and bass TAB automatically — and not just by stacking up note names, but by mapping everything onto a fingering you can actually play. This guide covers what it does, how to use it, and how to get cleaner results.
What is MIDI import?
MIDI import reads a standard MIDI file (.mid / .midi) and converts it to TAB. Pick one track from the file, and notave transcribes its performance into guitar or bass tablature.
The key idea: notave guarantees the fingering is playable. A MIDI file only stores which note plays, when, and for how long. Translating that into “which string and fret to press” is the job of notave’s fretting engine. So —
- Just by loading it, you get TAB with a playable fret fingering
- notave reads the line and keeps positions without needless lateral jumps
- The resulting TAB drops straight into notave’s editor for further tweaks
If you can sketch MIDI in a guitar synth or a piano roll, “program → convert → polish” makes TAB writing dramatically faster.
How to use it
1. Open MIDI import
Open notave and choose “MIDI to TAB” from the export menu. The MIDI import dialog appears.
2. Choose a MIDI file
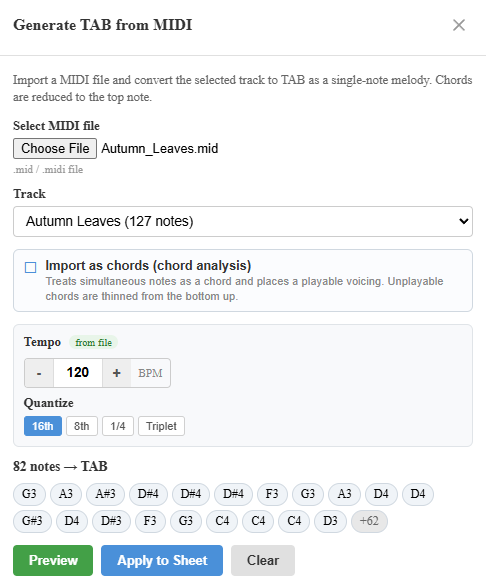
Use “Select MIDI file” to pick a .mid / .midi file. Once loaded, you’ll see a list of the tracks in the file and the tempo (BPM) detected from it.
The track with the most notes is selected automatically. If your MIDI has several instruments (melody, accompaniment, bass…), switch to the track for the part you want as TAB.
3. Choose how to import (melody vs chords)
This is the most important choice. There are two ways to bring the music in.
- Melody mode (default): transcribes the selected track as a single-note line. When a chord is present, it takes the top note at each moment as the melody. Use this for solos, riffs, bass lines, and melodies — anything that’s “one line.”
- Chord mode (turn on “Import as chords”): treats simultaneous notes as a single chord and places them into a voicing you can play on guitar. Chords that can’t be played (out of reach) are automatically thinned from the bass up so they resolve. Use this for chord comping and arrangements that include chords.
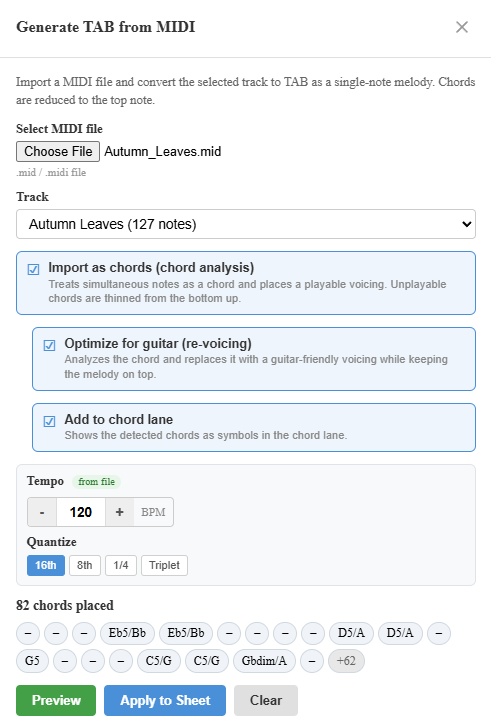
When chord mode is on, two more options become available.
- Optimize for guitar (re-voicing): analyzes the imported chords and replaces them with the most guitar-friendly voicings, keeping the melody as the top note.
- Reflect in the chord lane: shows the detected chords as symbols in the chord chart lane.
4. Tune the tempo and quantize
Tempo is detected from the file, but you can adjust it manually. Pick a quantize grid (16th, 8th, quarter, or triplet) to snap note lengths to a grid, which makes the score easier to read. Even loosely timed MIDI cleans up here.
5. Preview, then apply
Before committing, you can preview the result. If it isn’t what you expected, change the track, mode, or quantize and try again. When it looks right, hit Apply and the TAB is written into your current sheet.
Melody mode or chord mode — which one?
When in doubt, pick by the material you’re importing.
| What you’re importing | Recommended mode |
|---|---|
| Solo, riff, melody, bass line | Melody mode |
| Chord comping, parts with chords | Chord mode |
| Chords, but you only want the top note (melody) | Melody mode (takes the top note) |
| Make chords easy to play on guitar | Chord mode + Optimize for guitar |
| Keep chord symbols in the chord chart | Chord mode + Reflect in the chord lane |
You can switch between melody and chord mode and preview as many times as you like, so it’s worth trying both and keeping whichever fits.
Tips for a clean conversion
- Split your tracks: if melody and accompaniment share one track, melody mode keeps only the top note. MIDI with parts on separate tracks imports closer to what you intend.
- Quantize to tidy lengths: when very fine note values pile up, an 8th- or quarter-note grid makes things readable.
- Match the tempo: if the detected tempo feels off, set it manually before quantizing so the bar lines fall naturally.
- For dense chords: voicings of six or more notes that can’t be fretted are thinned from the bass up. If that isn’t what you want, try “Optimize for guitar (re-voicing).”
Is it free? Any limits?
MIDI import is free to use. No login required — open notave and try it right away.
The Free plan caps sheets at 8 measures, so importing a longer MIDI is trimmed to 8 bars. To turn a whole song into TAB, use the Pro plan ($2.99/month), which removes the measure limit.
Three ways to “auto-generate TAB”
notave offers several ways to get TAB without entering it by hand. Pick the one that matches your starting material.
- You have a MIDI file → MIDI import, this article. Turn programmed data straight into TAB with fingering.
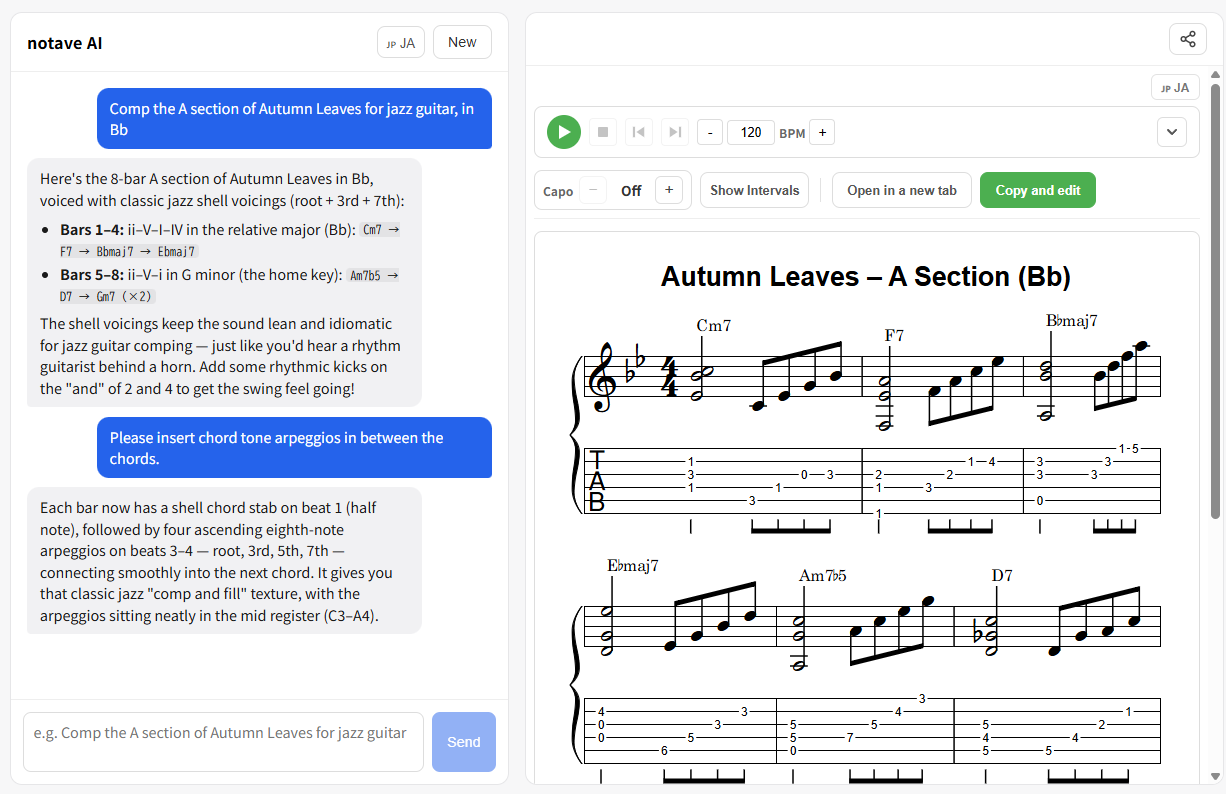
- You’d rather just ask → notave AI. Describe what you want — “comp a Canon progression in C” — and it generates the sheet.
- You want to write it yourself → the four input modes: Chord, TAB, Staff, and Manual.
Summary
notave’s MIDI import auto-generates playable guitar and bass TAB from a MIDI file.
- Load a
.mid/.midiand pick a track — that’s it - Melody mode for lines and solos, chord mode for chords
- Tempo detection, quantize, and preview get it just right
Start by loading a single MIDI file you have. At notave.zelva.dev there’s no sign-up and no install — try it now.
For polishing the imported TAB, see TAB notation basics; to hand a finished sheet to someone, see how to use share links.